Patient Statements
Patient statements will need to be processed regularly depending on your practice’s workflow. This section will demonstrate how to send the documents by paper through mail and electronically through the patient portal, or to your clearinghouse for them to mail.
Customize Statements
Before creating the first batch of statements complete these steps in Persons & Institutions | Practice.
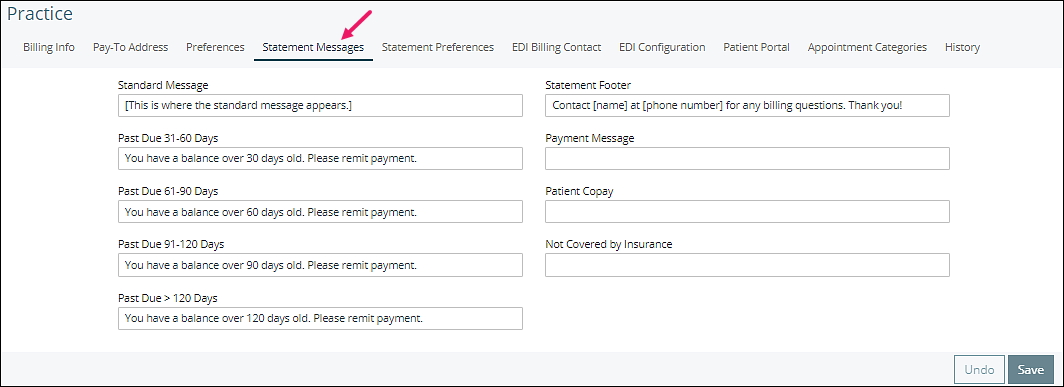
Customize messages by selecting the 'Statement Messages' tab and entering relevant information.
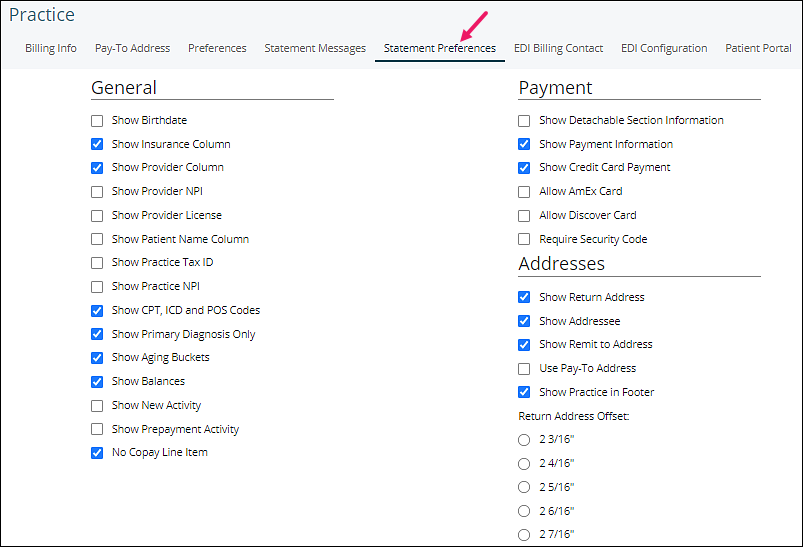
Customize information displayed on statements by selecting the “Statement Preferences” tab and choosing options.
Create Statements
Click on Billing | Create Patient Statements.
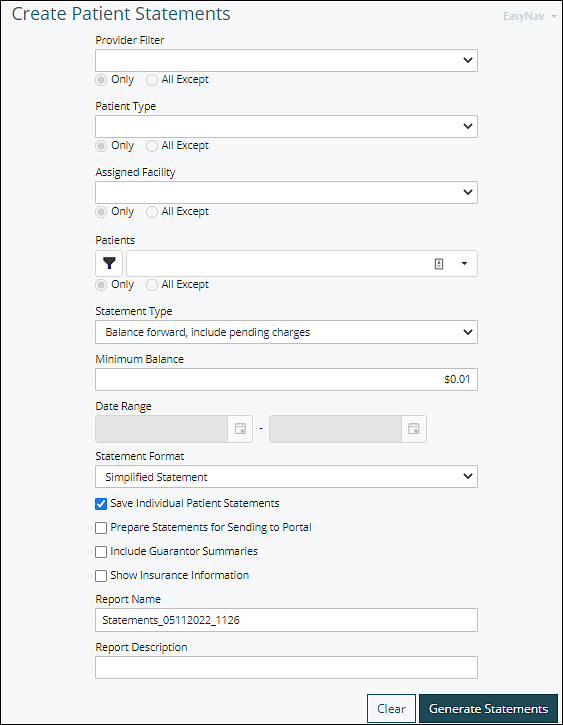
The Provider, Patient Type, Facility, and Patient filters are all options if only specific information is needed. Leave blank to print everything.
Select a "Statement Type" from the drop-down list.
- Balance forward: shows all billing transaction details from the last 30 days or since the last time the patient was sent a Balance forward statement, whichever is greater. Additionally, it will display the total patient responsibility from the previous Balance forward statement as a single line item at the top, but will not include visits that are still pending insurance processing.
- Balance forward include pending charges: same as above, but includes pending insurance visits.
- Outstanding charges only: will only print charges that have a balance remaining, whether it is insurance or patient responsibility.
- All charges: shows entire account history for the patient within the selected date range.
Enter a "Minimum Balance" to set the patient responsibility as a minimum dollar amount, or bottom limit, on statement generation. E.g. If you do not wish to send statements for balances less than $5.00 dollars, enter that amount here. To generate statements for all of the charges, even those with a zero balance, change this amount to $0.00.
Specify a "Date Range" if a particular period of time is desired.
Select a "Statement Format" from the drop-down list.
- Simplified Statement: system statement
- Export to CSV file: used for transmission to outside vendor (only available if "Offline Statements" is active in Non-core Modules)
Click appropriate checkboxes.
- Save Individual Patient Statements: uploads statement to patient chart in documents section, selected by default and is required in order to create Guarantor Summaries.
- Prepare Statements for Sending to Portal: when this box is checked, the generated summaries will be able to be sent to the portal for those patients who have a validated portal account, and have the setting "Statements are allowed to be sent to portal" checked in Patient & Institutions | Patients. A file will be created to print the remaining non-portal statements (as well as the portal statements if desired).
- Include Guarantor Summaries: combines patients with mutual guarantors on one statement.
- Show Insurance Information: statement will list the patient's insurance information.
The "Report Name" field is a default and can be renamed if necessary.
The "Report Description" field is optional to enter more information if desired.
Generate Statements
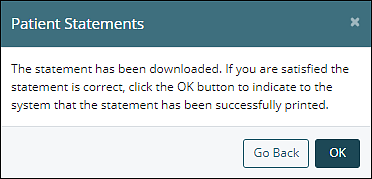
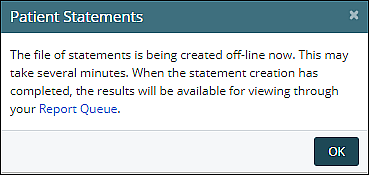
If only one patient was selected, when clicking Generate Statements, a Preview tab will open showing a view of the statement document, and the following Patient Statements pop up window will open on the original tab. Clicking "OK" moves the statement to the patient's documents if "Save Individual Patient Statements" is checked.
If multiple patients were selected, when clicking Generate Statements the following Patient Statements pop up window will open.
View Statements
Click on the Report Queue hyperlink or go to Tools | Report Queue from the navigation menu. This will take you to the Report Queue where you can see the statements that were created.
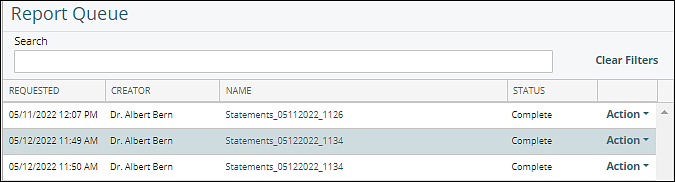
There are three possible statuses that can be shown in the Report Queue. If the Status is "Scheduled" that means the server is compiling the data, and after a few moments the Status should show "In process". If the Status is "In process", periodically click Refresh in the bottom of the left menu until the status is "Complete". If the status is "Complete", select the "Action" drop-down menu and then choose from the following:
- View Report
- Mark as Printed
- Mark as Printed and Move to Practice Documents
- Delete
If the "Prepare Statements for Sending to Portal" box is checked, the following options will show in the action drop down list.
- View Report
- Send to Portal and Mark as Printed or Sent
- Send to Portal and Move to Practice Documents
- Delete
Note: The second or third actions must be taken to start the aging process in Valant.