MYIO Appointments
Patients have the ability to request appointments through MYIO. Once submitted, these requests go into the Appointment Requests Queue where users at the practice can review, edit, reject or schedule appointments. The patient will be notified by e-mail of the appointment. The sections below will guide you through configuring the patient portal [MYIO] to accept appointment requests, how the Appointment Requests Queue works, Self-Check-In functionality, and what it looks like for the patient.
Appointment Requests Configuration
Practices with the Patient Portal are able to use this feature.
The patient must have an assigned provider and facility in Persons & Institutions | Patients | select patient | Demo tab.

Appointment Types
Appointment types are used only to support appointment requests through MYIO. To access the "Appointment Types" page in the EHR users will need to have the "Reference Data" permission.
To create an "Appointment Type":
- Click Reference Data | Appointment Types
- Click the + button
- Complete the "Name", "Description", and "Duration" (this field can be a minimum of 10 minutes and a max of 360 minutes, appointments must be a multiple of five between this range)
- Click Save

Provider Availability
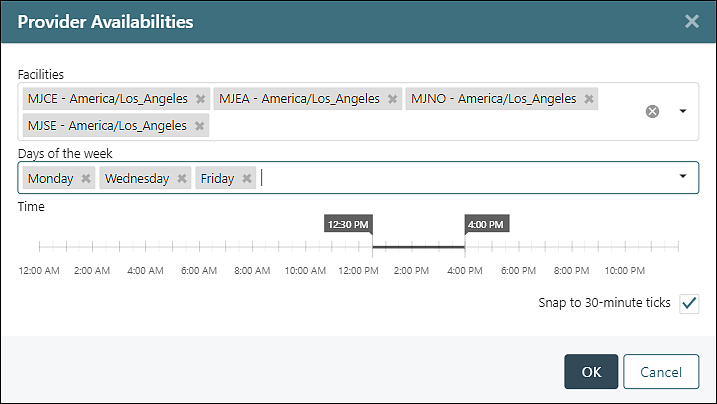
Users and providers with permission to access "Persons and Institutions" have the ability to configure availability for days of the week, times, and facilities. This will tell the system when the provider is available for appointments.
To configure Availability:
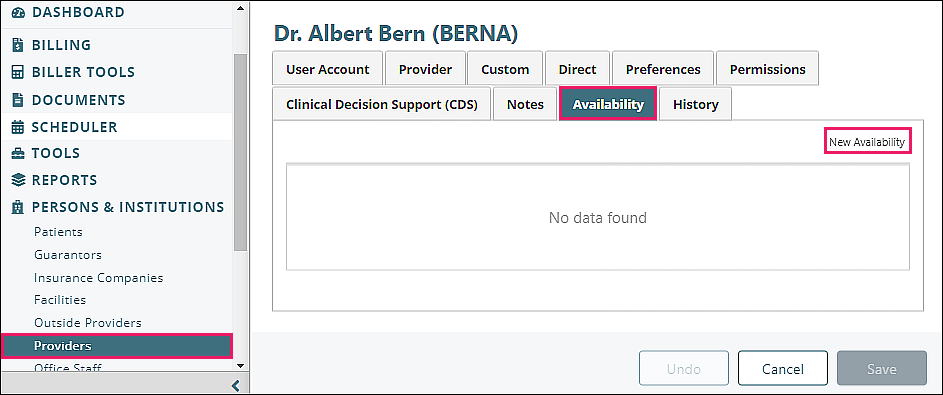
- Click Persons and Institutions | Providers | select provider | Availability tab | New Availability button
- The "Provider Availabilities" window opens and will allow the user to configure the availability by the facility, day(s) of the week, and time
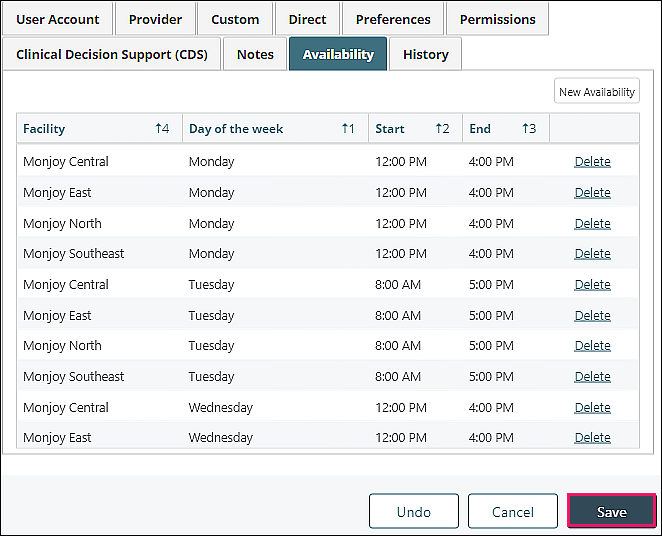
- Once desired settings are applied, click OK, then click Save on the "Availability" tab view
Appointment Requests Checkbox
To activate the appointment requests feature:
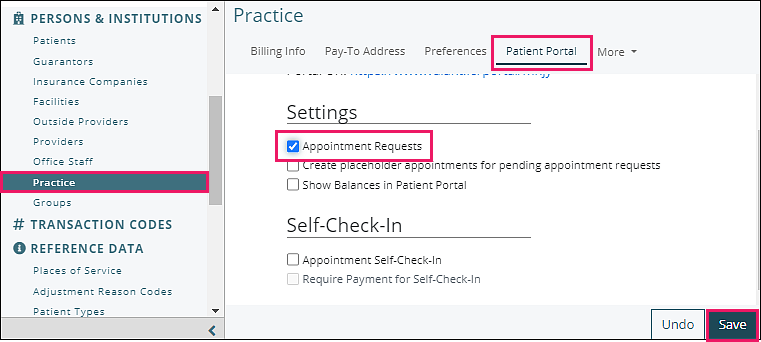
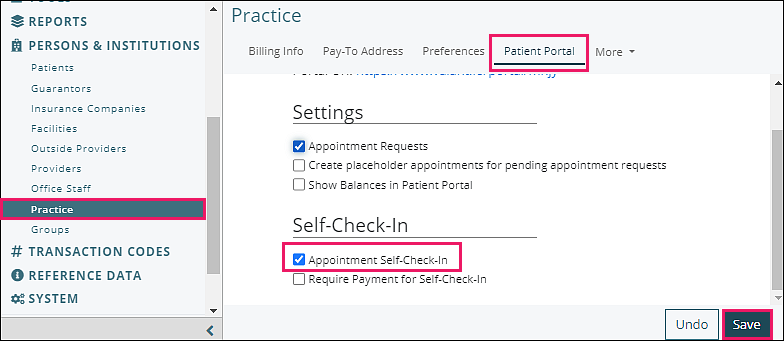
- Click Persons & Institutions | Practice | Patient Portal tab
- Click the "Appointment Requests" checkbox under "Settings"
- Click Save
Appointment Requests Queue
The "Appointment Requests Queue" will show a list of requests submitted through MYIO. It can either be accessed from clicking “Appointment requests” from the Action Items list on the Dashboard or clicking Tools | Appointment Requests Queue.
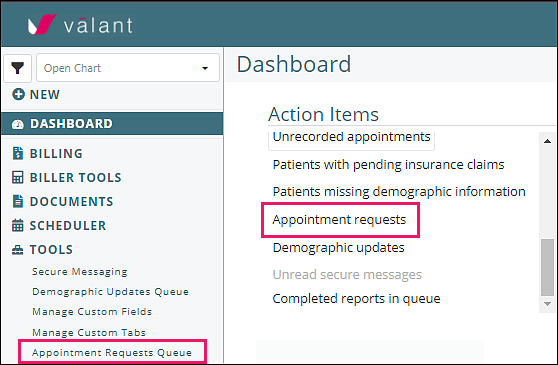
The list of appointment requests opens.

The data columns show the Request Date, Patient ID, Provider ID, Facility ID, Appointment Type, Appointment Date/Time, and New Prospect. The requests will be in order from the earliest request received. The columns can be sorted like other data lists in Valant. Clicking on an item from the list will open a "New Appointment" window.
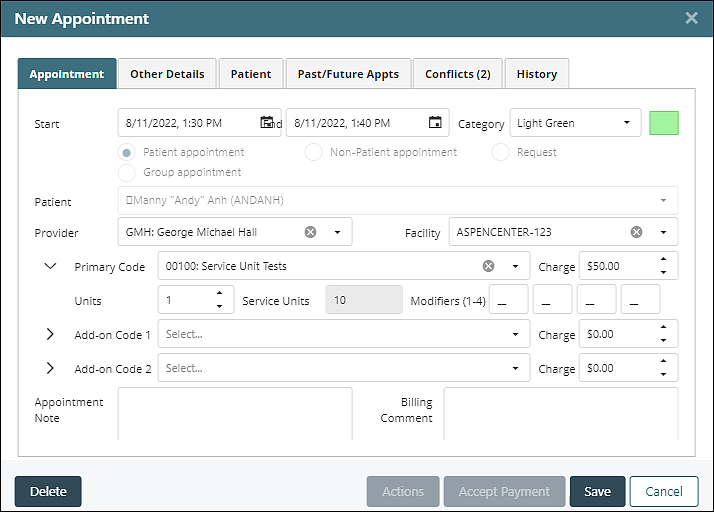
Edit appointment fields and click Save to accept the request, which adds the appointment in the Patient Portal | Upcoming Appointments section.
Clicking Delete removes the appointment request from the "Appointment Requests Queue" and sends a follow up message to the patient email on file stating, "Your appointment request on [Date] could not be confirmed. Log into your MYIO account to submit a new request for a different date/time, or contact [Practice Name] to schedule your next appointment."
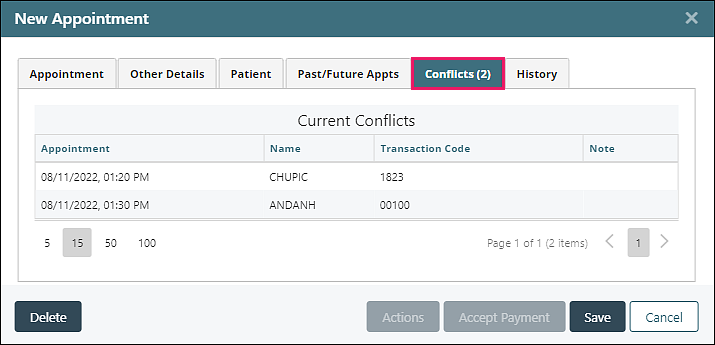
Potential conflicts are shown by selecting the "Conflicts" tab.
Self-Check-In
Practices can allow patients to self-check-in for appointments through MYIO. Self-Check-In can be enabled by selecting Persons and Institutions | Practice | Patient Portal tab | Appointment Self-Check-In.
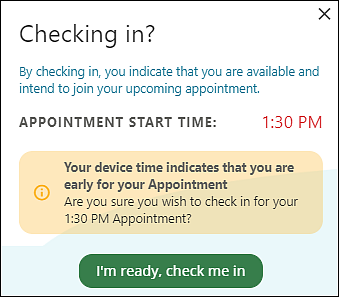
When self-check-in is enabled MYIO users will see an option to check in once the day of the appointment arrives.

If a patient attempts to check in more than 15 minutes early or late, a pop-up dialog will indicate that they are early or late and ask for confirmation before continuing to check-in.
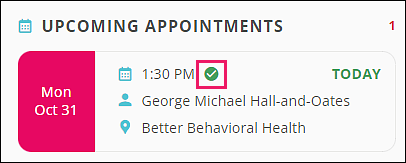
Once the patient checks in the green check mark will appear next to the appointment.
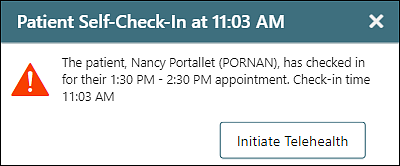
Once the patient checks in the provider assigned to the appointment will receive a check-in notification in the bottom right of the screen. If the practice has Telehealth enabled the provider will have an option to "Initiate Telehealth" from the notification.
