Patient Information for Billing
This article includes what is needed in the patient areas to be successful with billing management.
Patient Demographics
From the navigation menu select Persons and Institutions | Patients to access the "Patients" page to update demographic and insurance information for a patient.
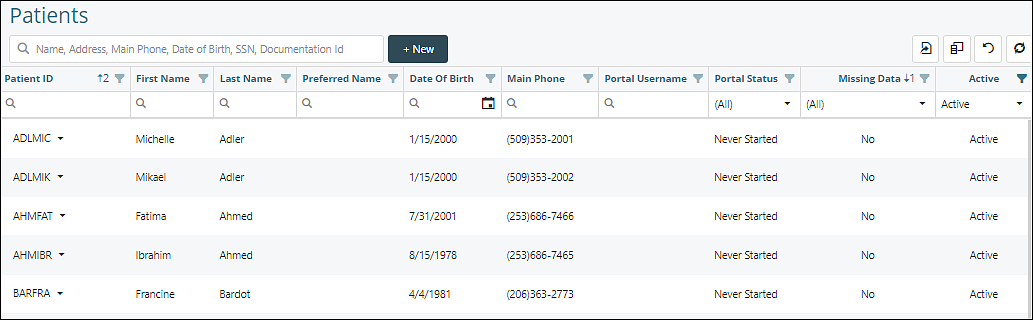
This page contains a list of patients and is where patient demographic information is stored and can be updated. Patients can be searched by Name, Address, Main Phone, Date of Birth, or Documentation ID to quickly lookup a specific patient. Each column can be filtered and the order in which the columns appear can be changed by dragging and dropping the heading.
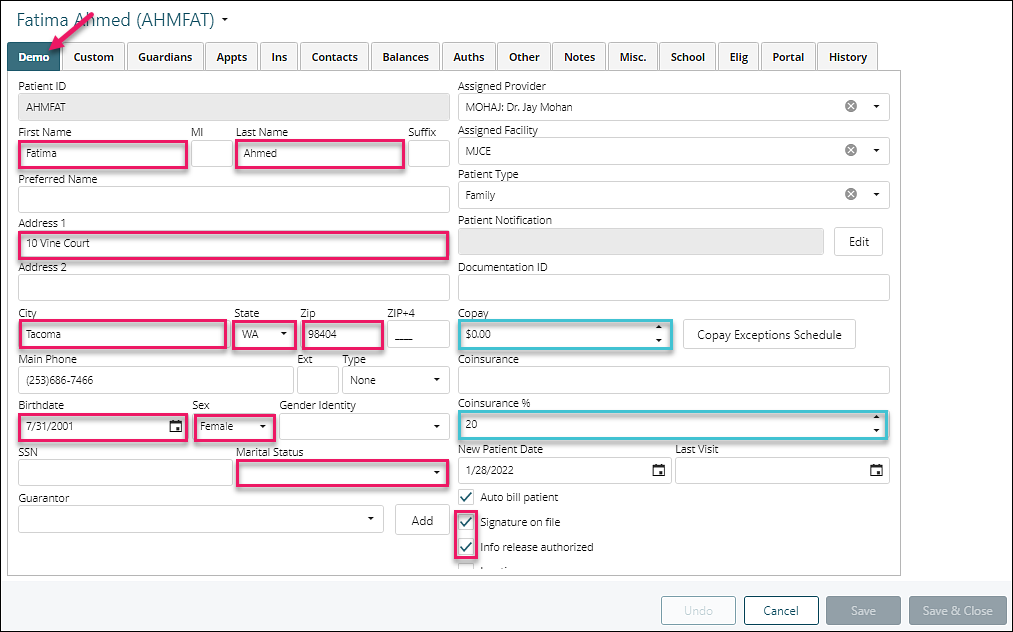
The "Demo" (demographics) tab allows for user demographics. For billing purposes, the fields highlighted in pink are required to be completed. Optional fields are highlighted in blue.
Guardians Tab
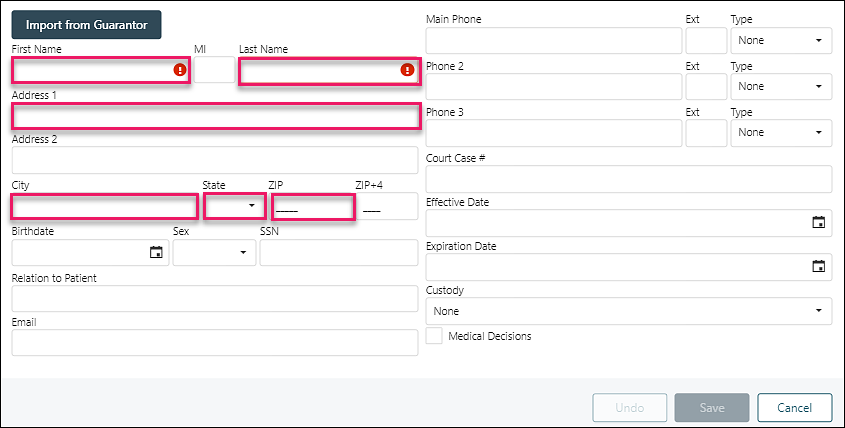
The "Guardians" tab allows users to list guardians for the patient. These guardians can be imported from the guarantor list or added independently.
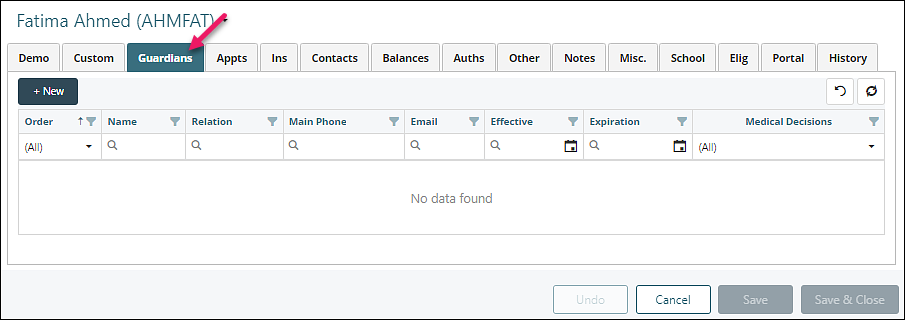
All highlighted fields are required for billing if the guardian is responsible for payment.
Insurance
The "Ins" (Insurance) tab allows users to add and manage insurances for the patient.
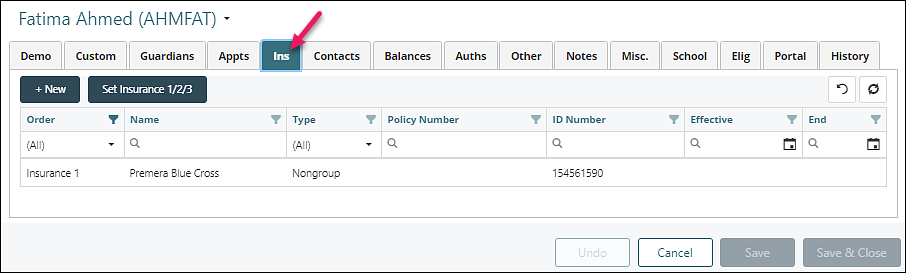
To see more information about managing insurance, click on the tabbed sections below.
Add
To add a new insurance for a patient:
- Click +New
- Complete the required fields (highlighted in pink): Order, Insurance, Type, ID number, and Relation to subscriber. The "Order" field allows users to select the order of an insurance not already assigned to the patient. Check the "Auto Bill Insurance" checkbox if you always want to automatically set insurance responsibility for this payor/patient. Select Accept Assignment if you will accept payment from the payor. Optional fields are highlighted in blue. If entering "Effective and End" dates, you do want to make sure they are correct as inputting incorrect dates can disrupt the revenue cycle with incorrect billing information.
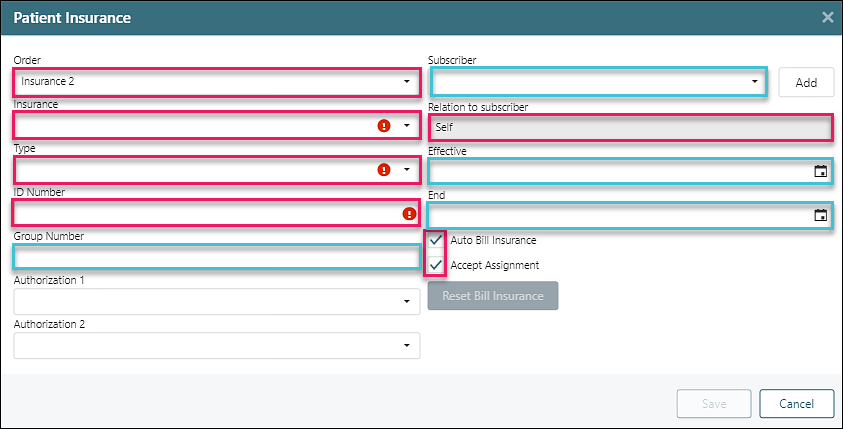
- Click Save to add the insurance.
Edit
To edit an insurance:
- Click on an insurance in the grid to open details for the existing insurance.
- On the "Patient Insurance" window users can edit the details. There is also a "Check Eligibility" button for practices that have eligibility checking and "Reset Bill Insurance" button.

- Click Save
Remove or Activate
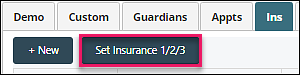
Click Set Insurance 1/2/3 to open the window.
The Set Insurance 1/2/3 window can be used to add and remove insurances that are active in the patient file. All insurances that have been saved for the patient will be available in the Insurances (Select up to 3) list on the left. Use the drop-down menu to remove or activate an insurance. The "x" can also be used to remove an insurance. Removing an insurance from the list on the left will remove the insurance from the Insurance Order on the right and reorder the remaining insurances.
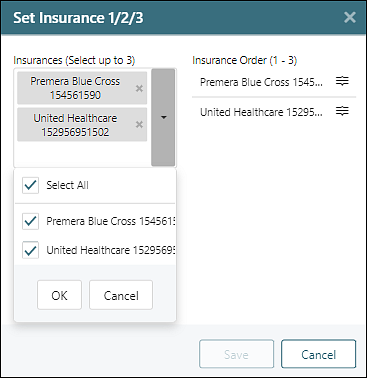
Reorder
Click Set Insurance 1/2/3 to open the window.

On the Set Insurance 1/2/3 window users can use the icon to drag and reorder insurances from the list on the right.

Click Save to keep any changes.
Balances Tab
Practices with the Billing Module enabled will have access to the "Balances" tab when selecting Persons and Institutions | Patients | select patient name | Balances. This tab will displace specific balance information and the Card Manager for practices with integrated credit card processing.
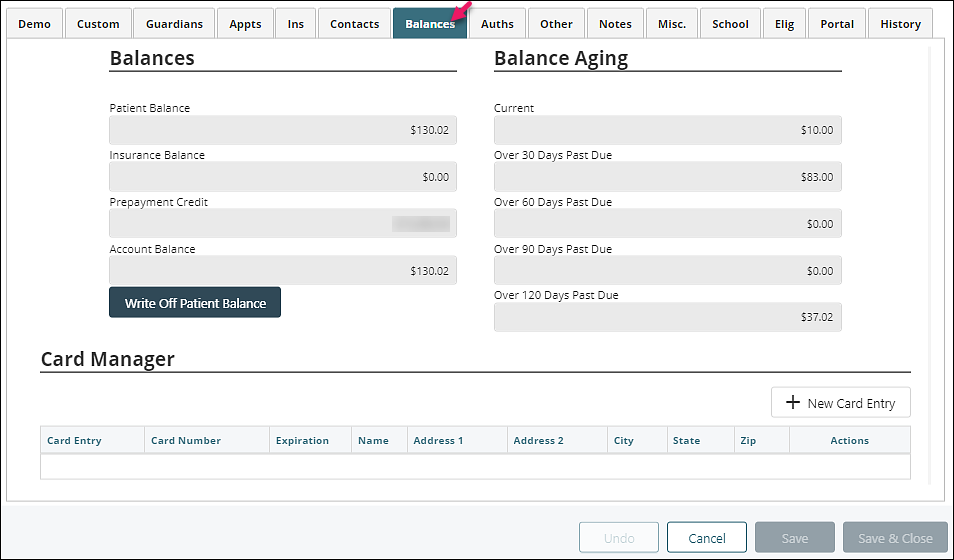
Balances Definitions
- Patient Balance: Amount set to patient responsibility (Note: the aging process may or may not have been started).
- Insurance Balance: Amount set to insurance responsibility (Note: the insurance balance includes items not yet billed to insurance).
- Prepayment Credit: Amount of prepayment on a clients account.
- Account Balance: Total combined of patient and insurance balance, does not include prepayment credit.
Balances Aging Definitions
- Current: Total patient balance currently due. (Under 30 days since a statement was marked as printed)
- Over 30 Days Past Due: Balance marked as printed on a patient statement in the past 30-59 days.
- Over 60 Days Past Due: Balance was marked as printed on a patient statement in the past 60-89 days.
- Over 90 Days Past Due: Balance was marked as printed on a patient statement in the past 90-119 days.
- Over 120 Days Past Due: Balance was marked as printed on a patient statement more than 120 days ago.
Card Manager
Practices that use integrated credit card processing can access the Card Manager from the Balances tab. Users can store credit card information to be used at a later date here. The card information is not available once saved due to PCI Compliance, however a token for the card is stored and can be used to process payments at a later date. If a patient saves a card via the Patient Portal, then that card will also be stored in the Card Manager. Cards added to the Card Manager in the EHR are not available to the patient in the Patient Portal.
To add a new card:
- Click + New Card Entry

- This will open the "New Card Manager Entry" window. Required information for billing is highlighted in pink.
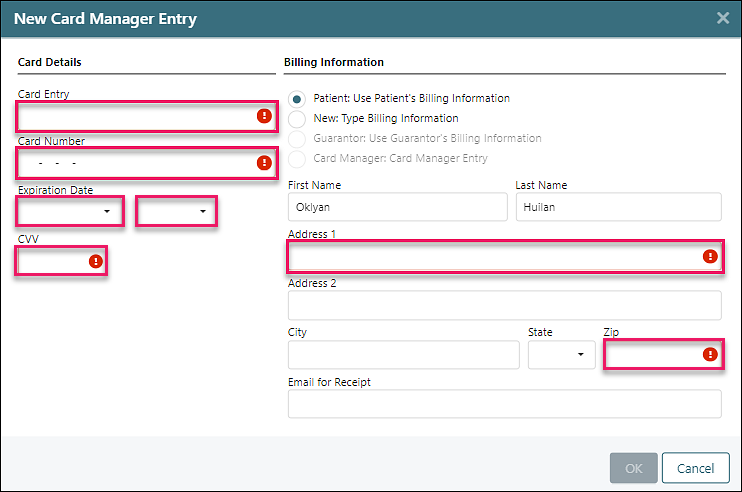
- Complete the required information and click OK
Authorizations Tab
In order to attach an authorization for a patient follow these instructions:
- Click Persons & Institutions | Patients
- Click on a patient and select the "Auths" tab
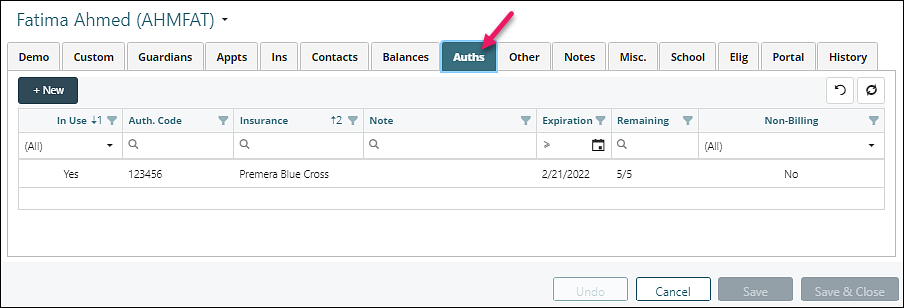
- Click +New: information required for billing is highlighted in pink
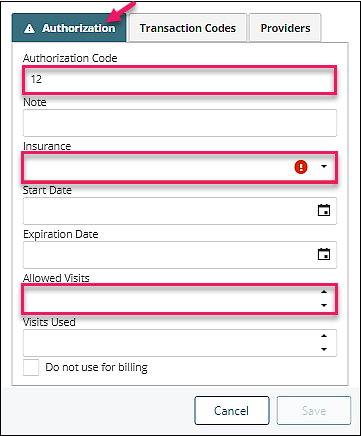
This window contains the following entry areas:
- Authorization Code field: code from insurance company that identifies the authorization.
- Note field: a miscellaneous note about the authorization.
- Insurance drop-down menu: the insurance company that granted the authorization.
- Start Date: the start date of the authorization.
- Expiration Date: the expiration date of the authorization.
- Allowed Visits drop-down menu: the number of visits granted by the authorization.
- Visits Used drop-down menu: the number of visits already used by the patient on this authorization.
- Do not use for billing checkbox: this disables the authorization from being used when billing the patient.
Transaction Codes Tab: a required tab that contains the transaction codes for which the authorization is approved. Check the box by the appropriate code and click OK.
![]()
Providers tab: a required tab that contains the providers that the patient can see under this authorization.
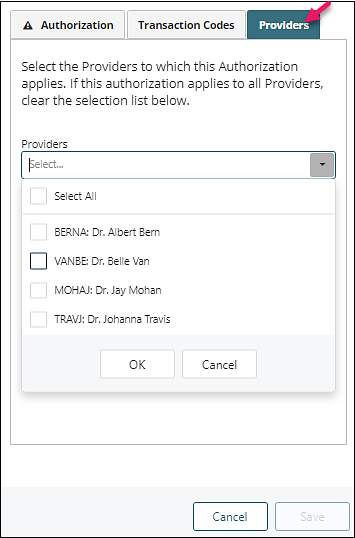
Click OK | Save to add the authorization.
In order to view or edit an existing authorization, please complete the following steps:
- Click Persons & Institutions | Patients | select patient | Auth tab
- Click on the authorization from the list
- Change information, click OK | Save